Your car’s interior is more than simply a place to sit; it reflects your style, comfort, and loyalty to your vehicle. Among the various components, plastic parts in the interior, such as the dashboard, door panels, and consoles, are prone to damage over time. Scratches, cracks, and discoloration can make your car look older than it is. Fortunately, you don’t need to be a professional car mechanic to fix these issues. This guide will walk you through the process of how to repair car interior plastic, helping you restore your vehicle’s beauty and value.
Understanding Car Interior Plastic
Before diving into the repair process, it’s essential to understand the types of plastic used in car interiors. Most modern vehicles use durable, lightweight, and flexible plastics like:
- Polypropylene (PP): Dashboards, door panels, and consoles are all common places to find them. It’s known for its resistance to chemicals and high-impact strength.
- Acrylonitrile Butadiene Styrene (ABS): Used in interior trim and dashboard parts. It offers a good balance of strength, rigidity, and ease of processing.
- Polycarbonate (PC): Often found in high-impact areas like dashboard clusters and console trims. It’s extremely strong and impact-resistant.
- Polyvinyl Chloride (PVC): Used for flexible parts like door panels and certain trim pieces. It’s easy to clean and maintain.
Understanding the type of plastic in your vehicle will help you select the best repair procedures and supplies.
Common Issues with Car Interior Plastic
Car interior plastic can suffer from various issues, including:
- Scratches: These can be caused by keys, sharp objects, or simply ordinary wear and tear.
- Cracks: Cracks often result from prolonged exposure to sunlight or impact damage.
- Discoloration: UV rays, heat, and chemical cleaners can cause plastic to fade or change color over time.
- Stains: Spills and dirt can leave unsightly stains on plastic surfaces.
Each of these issues requires a different approach for repair. Let’s look at how to handle them efficiently.
Tools and Materials Needed
Collect the required tools and materials before you begin.
- Plastic cleaner
- Sandpaper (various grits: 320, 600, 1000)
- Plastic adhesive or epoxy
- Plastic filler
- Heat gun or hair dryer
- Plastic primer and paint (colors to complement your interior)
- Microfiber cloths
- Plastic polishing compound
- Masking tape
- Small brush or applicator
- Plastic welding kit (optional for larger cracks)
To get Engine Repair Service visit.
Step-by-Step Guide to Repairing Car Interior Plastic
1. Cleaning the Surface
Importance: Cleaning is the first and most crucial step. Any dirt, grease, or contaminants can affect the adhesion of fillers and paints.
Process:
- Use a plastic cleaner made purely for vehicle interiors. Spray the cleaner onto the surface and wipe it down with a microfiber cloth.
- Use a gentle brush to gently scrape stubborn stains or filth from the affected area.
- Allow the area to completely dry before proceeding to the next step.
2. Sanding the Damaged Area
Importance: Sanding smooths out the surface and helps the filler adhere better.
Process:
- For scratches: Start with 320-grit sandpaper and gently sand the scratched area until it’s smooth.
- For cracks: Use 600-grit sandpaper to sand around the crack, creating a smooth area for the filler to bond.
- Remove any dust with a clean microfiber cloth.
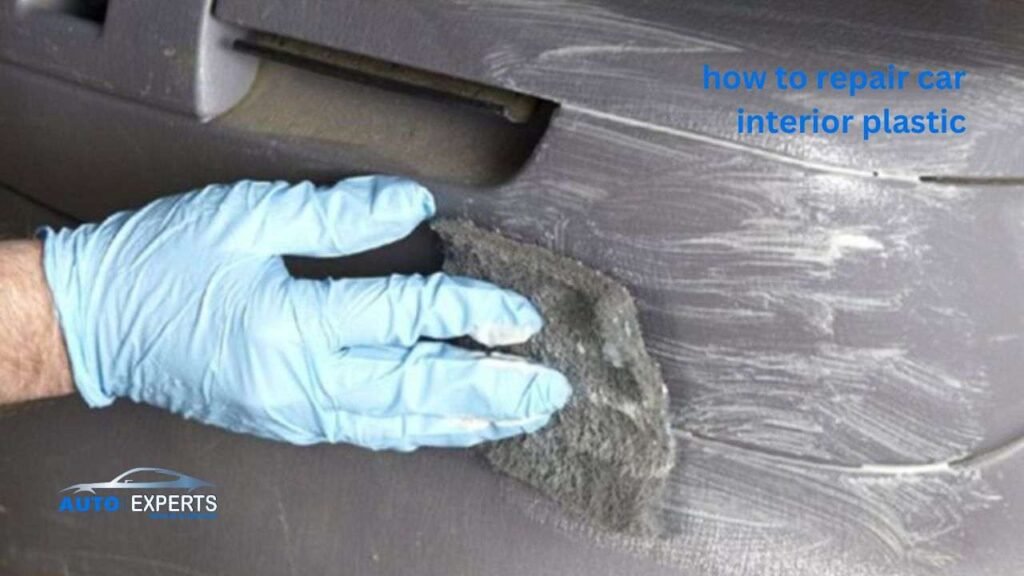
3. Applying Plastic Filler
Importance: Filling is essential for repairing deeper scratches, gouges, or cracks.
Process:
- Prepare the plastic filler or epoxy according to the manufacturer’s instructions.
- Apply the filler to the damaged area using a small brush or applicator. Make sure the filler is gently overfilling the area to allow for sanding.
- Let the filler cure as per the recommended time on the product label.
4. Sanding the Filler
Importance: Sanding the filler ensures a smooth, even surface that blends seamlessly with the surrounding plastic.
Process:
- After the filler has fully dried, sand the area using 600-grit sandpaper.
- Use 1000-grit sandpaper to achieve a finer polish.
- Check the surface for smoothness by running your fingers over it. It should feel even with the surrounding plastic.
5. Painting and Blending
Importance: Painting not only restores the color but also provides a protective layer to the repaired area.
Process:
- Mask off surrounding areas with masking tape to avoid overspray.
- Apply a plastic primer to the repaired area and let it cure per the manufacturer’s recommendations.
- Shake the paint can carefully, then apply light, even layers of paint that match the color of your car’s inside. Allow the previous layer to dry completely before applying the next.
- To achieve a perfect merge, carefully feather the borders of the painted area into the surrounding plastic.
- Allow the paint to sit for at least 24 hours after applying the final layer.
6. Polishing the Surface
Importance: Polishing enhances the shine and helps the repaired area blend in with the rest of the interior.
Process:
- Apply a small amount of plastic polishing compound to a microfiber cloth.
- Rub the compound into the repaired area using circular motions.
- Buff the area with a clean part of the cloth until it shines.
Advanced Repair Techniques
For more severe damage, such as large cracks or deep gouges, consider these advanced techniques:
Plastic Welding
Importance: Plastic welding is ideal for larger cracks that require a stronger bond.
Process:
- Use a plastic welding kit with a specialized heating element to melt the edges of the crack.
- Insert a plastic filler rod into the melted area and allow it to fuse with the damaged plastic.
- Once cool, sand and paint the area as described above.
Heat Gun for Warped Plastic
Importance: Heat can help restore the shape of warped plastic parts.
Process:
- Turn your hair dryer or heat gun to the lowest setting.
- Gently heat the damaged place, taking care to never overheat or burn the plastic.
- Once the plastic becomes pliable, shape it back to its original form using your hands or a molding tool.
- Allow the plastic to cool and harden in its new shape.
Preventing Future Damage
Preventing damage to your car’s interior plastic is as important as repairing it. Here are some tips:
- Use UV Protectant: Apply a UV protectant spray to your interior plastic surfaces to prevent sun damage and fading.
- Clean Regularly: Regularly clean your car’s interior to remove dirt, dust, and grime that can cause scratches.
- Avoid Harsh Chemicals: Use cleaners specifically designed for car interiors. Harsh chemicals can weaken and discolor plastic.
- Use Floor Mats and Seat Covers: Protect high-traffic areas with mats and covers to prevent wear and tear.
Conclusion
Repairing car interior plastic is a rewarding process that can restore the look and feel of your vehicle. With the right tools, materials, and techniques, you can fix scratches, cracks, and discoloration, saving money and enhancing your car’s value. Remember to take your time, follow each step carefully, and choose the appropriate products for your specific type of plastic. By doing so, you’ll ensure that your car’s interior remains in top-notch condition for years to come.
Whether you’re a car enthusiast or just someone who loves to maintain their vehicle, these DIY tips can help you keep your car looking as good on the inside as it does on the outside. So, the next time you notice a scratch or crack, don’t stress—just follow this guide, and you’ll have it looking brand new in no time!
For Wikipedia page creation agency visit.